Your personal Tumblr library awaits
Tutorial - Blog Posts
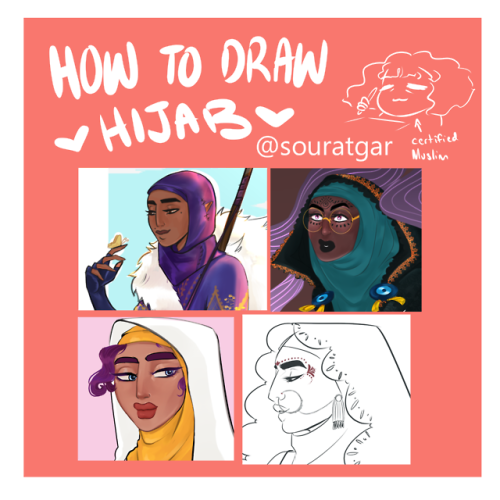
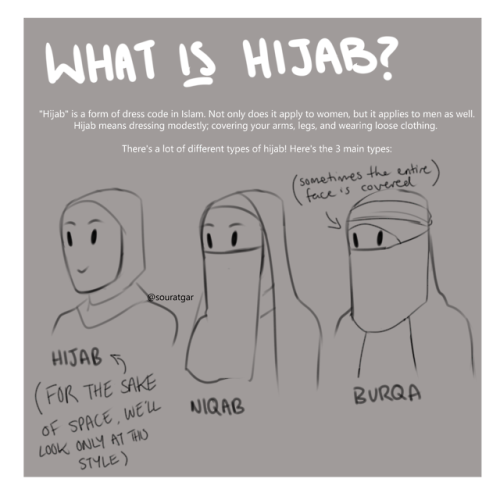


I made an art tutorial on how to draw hijab and hijabis!
mutherfucking chainmail brush
How to make a super awesome easy cheating chainmail brush for photoshop or any program that lets u make brushes
step one
draw a fucking loop

step tw0
take ur loop. go to edit > define brush preset (or whatever u use to make brushes idk man i use photoshop)
bam. now u got a brush.
but it does this shit.

and we don’t want it to do that shit.
so what u gotta do is
step 3
go to ur lil brush widget thingy

(this guy)
and he;ll take u to this sweet toolbox menu thingy

and then all u gotta do is fuck around with the spacing until it looks vaguely chain linky
and then u can do sweet arts like this

this tutorial has been brought to u by sleep deprivation
dont do art kids
now go forth and create beautiful chainmail without bawling you r eyes out as u singlHANDDLY draw every single fucking loop
You don't need more advice

What is it that you want? Think of it and own it. Truth is you already have it and worrying why are you not seeing it is useless. Stop searching for advice and tips and methods. You are falling into a trap of convincing yourself you need more information. You already know what to do, there's no specific way to do anything so why are you so certain you have to do this and that...
You ALREADY have everything you want. Anything you want is not even a finger lift away, it not in front of you because you are already in it. We are born with a gift given by ourselves to have everything we want.
If you really need a easy explanation on how (I) shift/manifest im going to simplify it for you:
Decided what you want (where do you want to go, what do you want to change..) and affirm it and then persist no matter what you see, hear or feel. It is yours, it is for you to claim it and persist till you have in your physical world.
Happy shifting loves <3🎀
hi! I wanted to ask how you got the outline around the moving creme a la mode cookie in your blog's banner!

haii ^_^ ofc !! i'll make a mini tutorial here :3
i'll use shadow milk as an example:

my photopea's in spanish so i'll try to translate !!
here, you have to click 'layer'

and a window'll pop up !!

click 'layer style' and another window'll pop up:

click 'stroke' .

here you can change the width, color and opacity of the outline !! then , click 'OK' .

^ if youve done everything correctly, it will look like this
finally, click 'file' > 'export as' > 'gif' . yayay ur done !!

finished result :3 feel free to send another ask if you still have doubts !!


Some drawing tips previously posted on twitter. More drawing tips on my patreon. Hope some of these can be helpful.
Hmm seems very very interesting.. and useful ! :D

Requested by some of the lovely people on the Sidon Discord, hopefully helpful to other people as well?
I definitely do not promise to be efficient in drawing arms, please ignore any horrific arm-related anatomical errors. I’m still learning how to draw them!


hello, i'd like to inform u that i find ur art extremely beautiful and bc of that i got the urge to learn how to do pixel art, so yeah its been a while since doing anything art related so thanks. do u have any tips for begginers? hope ur doing well ♡
thank you so much!! always happy to inspire 💗💛
the biggest resource i used when i was learning pixel art was the pixeljoint forums. you can see the most popular resources here!
(i would skip over any of the threads about software, they're all dated before aseprite came out. its genuinely the only software you need nowadays. it's on steam!)
this thread especially is very useful for first learning the basic rules.
there' s a lot of things that are specific to pixel art that you will need to learn, but there is also a lot of general art knowledge you'll need. i've been doing studies and school for art longer than i can remember. just takes a lot of time, that's all there really is to it : )

Simple cloudscape tutorial!
For my 100th post, I want to show you guys how I make some of my art!
First I will make a base that looks like a stick figure, sorta... the stereotypical circle with a t in it that a lot of artists use. This technique is actually used to know where you are gonna place the eyes, mouth, and other facial features. Your drawing can be sketchy if you would like and I will explain why next.


Next, I will upload the picture to a digital art program, it can be anything even MS paint, I would recommend an art program that has a lasso tool,(the tool where you circle something and you are able to move it) a layering system, (EXTREMELY USEFUL) you are able to rotate the screen, and where you can pick your own colors off of a color wheel or square. I am not able to download any programs on this computer so I am using Chrome Canvas, which came with it. I usually use FlipaClip since animation apps in my experience have worked better even for a non-moving drawing. I will put a layer above it and trace the lines I like best. I usually use my finger and not the mouse or mousepad just because it is easier/more comfortable for me. The 78 on the left of the right picture is the size of the brush I am using, I just write it down to remember it when I switch sizes for different lines.


After I am done finishing the line art, I move on to color. For this I usually start on the darker lines like the dark green lines on the helmet, I do this because If I were to do the light green color on the helmet, I cannot see where I wanted the dark green lines behind it. You can always just hide the light green by pressing a hide button (usually in the shape of an eye) I do the darker green and the lighter green on the helmet on different layers, the dark green above the light so it does not cover the dark ones up. Remember to keep the Lineart above the other layers while you do this. The yellow numbers on the right of the right picture are codes for colors, sometimes when you go to your color wheel or square there is a area to type that has a # sign in front of it, different codes give you different colors, and since I cannot save those colors on a palette I write them down for later just in case. You may not need to do this if you can save colors to a palette or an eyedropper tool. (much easier..) Right below the line art and above the two color layers, I add a shading layer. You can shade to your heart's content, but deciding on where the light comes from helps show you where shadows would be realistically.

Next, I erase the color so it stays inside the lines, and remove the background. (In a lot of my drawings I usually keep the background I traced it from, for example, my Ripjaws drawing, because I think it looks nice, but that is just my preference..) After that, I re-color the background (usually a solid color but I am working on making backgrounds as I grow, again, preference!) Then I add finishing touches like the white lines on the face like the cartoons. I honestly prefer the image on the left though.


Sorry for such a long post! thank you for sticking with me for so long! I thank all 59 followers for supporting my art and interests and being there. I hope you have a nice day you majestic people.
A sorta bitchy, self righteous tutorial on making pose "bases" for 2D illustrations. Not expert, I am sorry.
reblogging on the off-chance any artists who follow me haven't read this WONDERFUL post full of excellent advice. Its ALL here :D
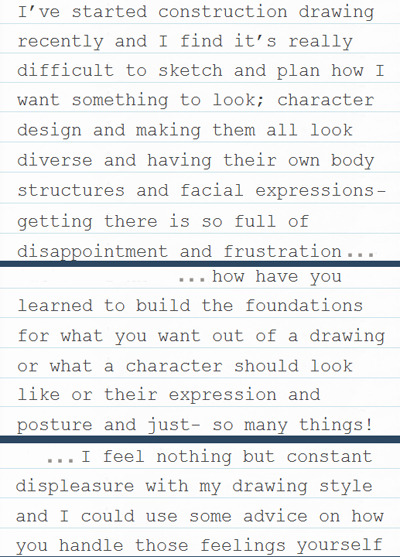
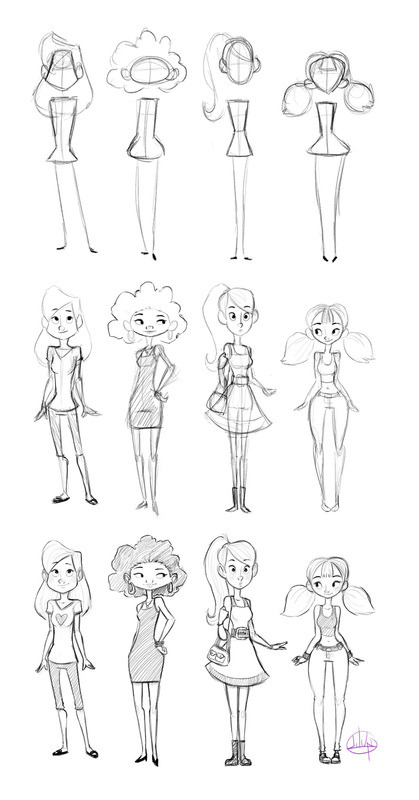
Character design and drawing are tome-sized topics and even if I had all the answers (I don’t - I have a lot to learn), I’m not sure I could communicate them effectively. I’ve gathered some thoughts and ideas here, though, in case they’re helpful.
First, some general things: - Relax...
🎮 HEY I WANNA MAKE A GAME! 🎮
Yeah I getcha. I was once like you. Pure and naive. Great news. I AM STILL PURE AND NAIVE, GAME DEV IS FUN! But where to start?
To start, here are a couple of entry level softwares you can use! source: I just made a game called In Stars and Time and people are asking me how to start making vidy gaems. Now, without further ado:
SOFTWARES AND ENGINES FOR PEOPLE WHO DON'T KNOW HOW TO CODE!!!

Ren'py (and also a link to it if you click here do it): THE visual novel software. Comic artists, look no further ✨Pros: It's free! It's simple! It has great documentation! It has a bunch of plugins and UI stuff and assets for you to buy! It can be used even if you have LITERALLY no programming experience! (You'll just need to read the doc a bunch) You can also port your game to a BUNCH of consoles! ✨Cons: None really <3 Some games to look at: Doki Doki Literature Club, Bad End Theater, Butterfly Soup

Twine: Great for text-based games! GREAT FOR WRITERS WHO DONT WANNA DRAW!!!!!!!!! (but you can draw if you want) ✨Pros: It's free! It's simple! It's versatile! It has great documentation! It can be used even if you have LITERALLY no programming experience! (You'll just need to read the doc a bunch) ✨Cons: You can add pictures, but it's a pain. Some games to look at: The Uncle Who Works For Nintendo, Queers In love At The End of The World, Escape Velocity

Bitsy: Little topdown games! ✨Pros: It's free! It's simple! It's (somewhat) intuitive! It has great documentation! It can be used even if you have LITERALLY no programming experience! You can make everything in it, from text to sprites to code! Those games sure are small! ✨Cons: Those games sure are small. This is to make THE simplest game. Barely any animation for your sprites, can barely fit a line of text in there. But honestly, the restrictions are refreshing! Some games to look at: honestly I haven't played that many bitsy games because i am a fake gamer. The picture above is from Under A Star Called Sun though and that looks so pretty

RPGMaker: To make RPGs! LIKE ME!!!!! NOTE: I recommend getting the latest version if you can, but all have their pros and cons. You can get a better idea by looking at this post. ✨Pros: Literally everything you need to make an RPG. Has a tutorial inside the software itself that will teach you the basics. Pretty simple to understand, even if you have no coding experience! Also I made a post helping you out with RPGMaker right here! ✨Cons: Some stuff can be hard to figure out. Also, the latest version is expensive. Get it on sale! Some games to look at: Ib, Hylics, In Stars and Time (hehe. I made it)

engine.lol: collage worlds! it is relatively new so I don't know much about it, but it seems fascinating. picture is from Garden! NOTE: There's a bunch of smaller engines to find out there. Just yesterday I found out there's an Idle Game Maker made by the Cookie Clicker creator. Isn't life wonderful?
✨more advice under the cut. this is Long ok✨
ENGINES I KNOW NOTHING ABOUT AND THEY SEEM HARD BUT ALSO GIVE IT A TRY I GUESS!!!! :
Unity and Unreal: I don't know anything about those! That looks hard to learn! But indie devs use them! It seems expensive! Follow your dreams though! Don't ask me how!
GameMaker: Wuh I just don't know anything about it either! I just know it's now free if your game is non-commercial (aka, you're not selling it), and Undertale was made on it! It seems good! You probably need some coding experience though!!!
Godot: Man I know even less about this one. Heard good things though!
BUNCHA RANDOM ADVICE!!!!
-Make something small first! Try making simple: a character is in a room, and exits the room. The character can look around, decide to take an item with them, can leave, and maybe the door is locked and you have to find the key. Figuring out how to code something like that, whether it is as a fully text-based game or as an RPGMaker map, should be a good start to figure out how your software of choice works!
-After that, if you have an idea, try first to make the simplest version of that idea. For my timeloop RPG, my simplest version was two rooms: first room you can walk in, second room with the King, where a cutscene automatically plays and the battle starts, you immediately die, and loop back to the first room, with the text from this point on reflecting this change. I think I also added a loop counter. This helped me figure out the most important thing: Can This Game Be Made? After that, the rest is just fun stuff. So if you want to make a dating sim, try and figure out how to add choices, and how to have affection points go up and down depending on your choices! If you want to make a platformer, figure out how to make your character move and jump and how to create a simple level! If you just want to make a kinetic visual novel with no choices, figure out how to add text, and how to add portraits! You'll be surprised at how powerful you'll feel after having figured even those simple things out.
-If you have a programming problem or just get confused, never underestimate the power of asking Google! You most likely won't be the only person asking this question, and you will learn some useful tips! If you are powerful enough, you can even… Ask people??? On forums??? Not me though.
-Yeah I know you probably want to make Your Big Idea RIGHT NOW but please. Make a smaller prototype first. You need to get that experience. Trust me.
-If you are not a womanthing of many skills like me, you might realize you need help. Maybe you need an artist, or a programmer. So! Game jams on itch.io are a great way to get to work and meet other game devs that have different strengths! Or ask around! Maybe your artist friend secretly always wanted to draw for a game. Ask! Collaborate! Have fun!!!
I hope that was useful! If it was. Maybe. You'd like to buy me a coffee. Or maybe you could check out my comics and games. Or just my new critically acclaimed game In Stars and Time. If you want. Ok bye

⭐ Pixel Art Fundamentals - Hue Shifting
This technique is not uniquely specific to pixel art, but it's a very common term to hear when starting out watching those "dos and don'ts" videos. So what is hue shifting?

Hue shifting basically means to change the hue when making your shade darker or lighter. In this context, 'hue' = colour!

You may hear 'you need to hue shift more' when getting feedback on your art, but what does that mean really? Here are some examples:

We can see even with just a bit of hue shifting, we have quite a different vibe for each drawing. In warm / daylight settings, no hue shifting can sometimes look a bit muddy or grey.
If we swap the image to grayscale, you can see that they look much the same:

As long as the hue shifted colours have a brightness that makes sense, they usually will work. You can get quite wacky with it.


But is hue shifting always good? Not necessarily.
Below is some of my art where I intentionally didn't hue-shift at all. You can see it gives them an uncanny, digital, or photographic kind of look. As always, techniques are about your intention, or personal style.


I recommend trying different hue shifting methods! I especially love to use a cool blue or teal for the lighter shades.


Thanks for reading and I hope this helped a little! Have fun with it!!
⭐ Read my full pixel art guide here!


🌿 How to draw simple grass for a game

Thank you kind asker I will make a tutorial below for grass. I'll do shrubs and trees in another one, because it's a different method and it got pretty long.


🌿 How to draw grass tiles: step-by-step
Each box is 16x16, the same size Stardew Valley uses. Make it tile (how to do it depends on your software) so we can see if our edges match up nicely.

Draw 1 simple blade of grass. Many options for shape but I like this one. Feel free to copy me directly

2. Give it a shadow. Wow !!!

3. Give it a highlight! OMG!

4. Add another grass

5. Do it over and over and over and over and over
Literally just do the same or similar blades of grass, give them all little shadows, highlight a few if you want and there you have it! So easy.
It looks really complicated like this, but its literally just a few steps, repeated over and over.

Many games use this technique and it would be perfectly serviceable for a base grass tile.
Personally, I prefer lower contrast grass. This tile will likely be used for large areas, so ideally you don't want it to be too busy or eye-burning to distract from the character.
🌿 I'll show you how to do a different type of grass now that is a little more complicated.
Midtone grass colour

2. Add some lighter and darker patches touching each other (not too high contrast!)

3. Use this shape (or your preferred, but this is how I did it) on the top edge of your patches. Colour them with the middle colour from each patch.

4. Do it again a lot (this is very tedious)

5. Add some highlights

6. Add some fun extra stuff

We're done! Have fun everyone, show me if you try it!
Pixel Art guide by me: link


easy tutorial for how i made this simple stylized "nebula" from my 'head full of stars' piece. note that this is not the only way, or the best way to do it, it's just the way i did it (and i made it up). enjoy
btw this was made with my 8 colour palette 'supernova' which you can download free here. eyestrain warning maybe
30% off pixquare pixelart app with code 'tofu' 💕
pixelart guide | support me | commission me | buy a print | buy a sticker


I want to start drawing landscape. Do you have any tips?
Took me a while to answer this (sorry anon)! Drawing landscapes for me are mostly just a matter of doing a few 'art studies' and a bit of imitating life. Here's a brief rundown of my process. I find that I learn best when I see a picture or a reference that really tickles my fancy, like these ones! First image for it's colors, and the second for it's composition.


And then I pull up the dreaded white canvas on start on a rough idea or just start dribbling out the basics: composition, a bit of color, general shapes, etc. If you have a hard time doing general landscapes, don't worry! Imagine breaking it down like this: You layer on some general colors and shapes; don't be afraid to make mistakes, you can always go back to it! Be loose and organic with it at first, we're not striving for detail yet, and just let that brush move freely. And once you got the shapes down, you can go back and forth in the canvas to start detailing. I find that it's best if you really look into how some things are "made". Like for example, how that patch of grass in your reference is made: 'is it layered? does it have some shiny bits in it that I wanna highlight? are the blades of grass sharp enough to individually detail or more clumped up together to just put in a sorta grassy blob?'. Also, don't be afraid to experiment a bit. Try putting some highlights around the edges to make it pop out more, or try putting small changes in the color you're working with; something that's close but still different, so that it compliments each other! Then it's just a matter of going forward with it; see what you like and what you wanna keep and imitate, see what you want to change or maybe just leave out on. Keep on detailing and going until you're happy with it!

This is a really brief rundown and explanation of a process that can be entire unique to each and everyone of us, and takes a bit of time and practice to pull off. But I believe in you! We all start from somewhere, sometime down the line; and that can start right now if you want it to! Goodluck to any artists out there who wanna try out landscapes. It's a fun and comforting process of organic and loose art that breathes in a lot of life in some people, especially me. Twitter | Prints | Ko-Fi | Patreon


11 of my tutorials (Couldn't fit more in this post). All available on my discord though!: http://discord.gg/n5TDnqfR5P
If you want to support these:


11 more of my tutorials! If you want to support me in making more, or view all my tutorials in one place, please check out my Patreon. Thanks!


TofuPixel Links + FAQ - Commissions Open!
🌟 Building a game: @wishlings 🌠
My Portfolio
Support me: Commissions | Tip Me | Digital Store | Print Store | Game Assets | Stickers + Merch
Socials: Twitter | Cara | GameJolt | TikTok
Yes you can use / cross-stitch my work for personal use! <3
🎨 Pixel Art Beginner Guide
Hello, I'm Tofu, a pixel artist based in England. I work full-time doing pixel illustrations or game-art. I started learning in my early 20s, so no it's not too late for you!
I run a 7k+ member Discord server called Cafe Dot, where we host events like gesture drawing and portrait club.
I currently have Good Omens brainrot so expect some fanart on this blog. I also occasionally do/reblog horror art so be mindful of that!
Due to so much AI nonsense on every platform, all my public work will be filtered/edited with anti-AI scraping techniques. Supporters on my Ko-Fi can see unfiltered work and also download it.
Want to learn how to do pixel art? Check my tutorial tag!
Other tags:
tutorial (not pixel specific)
my art
follow (artists i recommend)
🌟Free Stuff!!!
❔FAQ
What app do you use? I use Aseprite on PC and occasionally Pixquare on iOS (use code tofu for 30% off Pixquare!! <3) Free alternative: Libresprite on PC
Why does your art look so crunchy / compressed? Glaze
How did you learn pixel art? I first started out watching MortMort and making tiny sprites. Then once I started getting interested in landscapes/environment art, I did many, many Studio Ghibli studies.
How can I also protect my art? You can use Glaze and Nightshade- Glaze protects against Img2Img style copying, and Nightshade poisons the data so the AI thinks it's the opposite of what it actually is. There is a lot of misinformation going around (likely from pro-AI groups) so do your own research too! If you're a pixel artist you can also tilt or blur your art after upscaling, which will make it near useless to AI models (or regular thieves) once downscaled again.
Feel free to send me an ask if there's anything you want to know! I am always happy to help beginners :--3


I made you the most beautiful tutorial ever >.> (click the images to read my writing legibly lol) WARNING: YOU CANNOT EDIT YOUR TEXT ONCE YOU DO THIS; SAVE YOUR DEFAULT TEXT LAYER JUST INCASE!
-Ani